
Sharing My Method: Prepared Edge Piecing
- vafibrearts

- Jul 15, 2025
- 3 min read
Hello Friends and Welcome!
This week, I'm planning to spend a few days visiting with my Mom and Sister!
We have plans to see a production of Anne of Green Gables in Stratford, but otherwise are planning to enjoy each other's company, which means I need to prepare some hand piecing!
I'd like to work on my Ice Cream Soda quilt, and since it's an English paper piecing (EPP) pattern, I'll need to do a little prep work first. I don't like to use papers in my hand piecing though; they may provide stability, but they also make unnecessary waste.
Instead, I baste my edges with thread in a method I've come to call prepared edge piecing, and I'm excited to share that method today!
Cutting
The first step is to cut the fabric.
For my Ice Cream Soda quilt, the pieces I need are joining triangles from my solid amber fabric, and some small diamonds as well.

Most EPP patterns come with paper templates to use as cutting guides, but I have a 60° diamond ruler that works for both of the shapes I need. The ruler includes ¼" for seam allowance, which is narrower than many people prefer for EPP, but is what I tend to use.
Marking
After cutting my pieces, I mark the stitching line on the back of the fabric.
I like using a mechanical pencil for the marking since the narrow lead remains sharp and precise without needing to sharpen it, and I mark on the back of the fabric so the line won't be seen on the finished quilt.
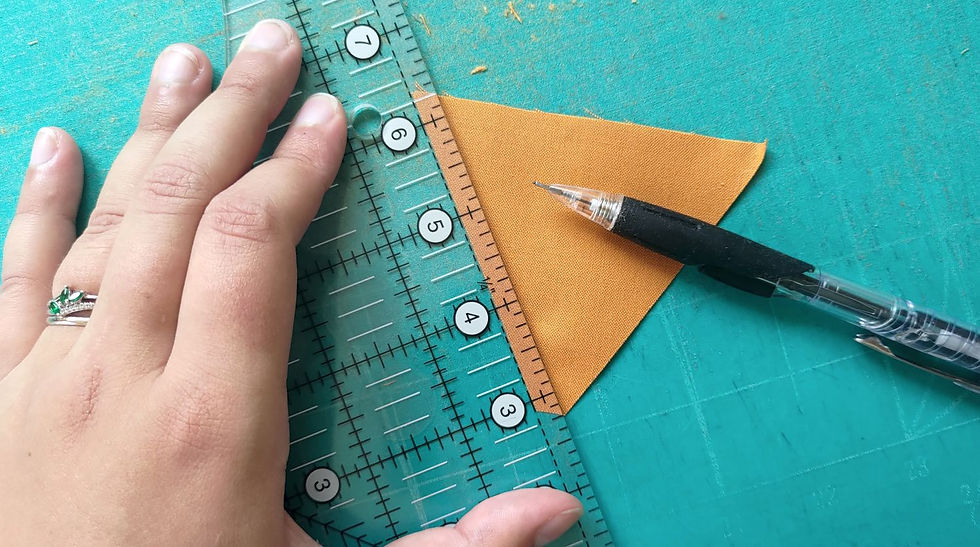
When measuring my seam allowance, I place the ¼" line just slightly off the side of the fabric. This accommodates the width of the pencil lead so the drawn line falls directly along the ¼" seam line.
After marking, there's an additional optional step; clipping away the excess fabric at the pointed corners of the triangles.

I really couldn't say why I do this, it's simply a habit I picked up. It might help to reduce bulk on the back of the quilt, or it might just be an aesthetic preference.
Finger Pressing
The next step is to fold the raw edges to the back of the cut piece.
Since I mark on the back of the fabric, the drawn line disappears under the folded edge of the fabric.


To keep track of its precise location, I place my thumb nail on the drawn line, then use my other hand to fold the raw edge and pinch it in place.
After that, I crease the fold by pressing along it with my thumb nail. I repeat the process every inch or so along the marked line until I've returned to where I started.
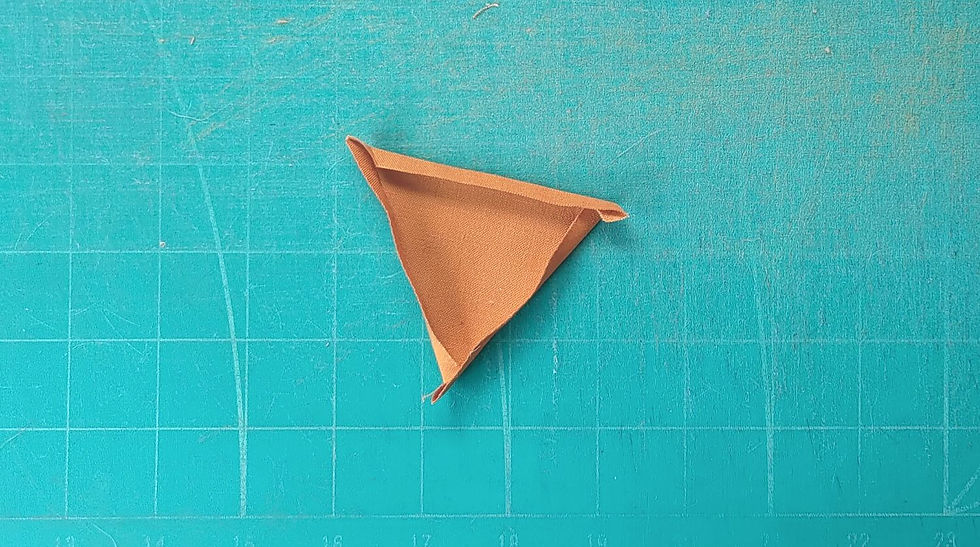
The depending on whether the fold follows the grain of the fabric, different sides will hold the fold more tightly.
Thread Basting
After creasing around the edge of the piece to define its shape, I baste the folded edge in place using long stitches.
There are many different methods for basting, a popular one being glue basting, but I prefer thread basting.
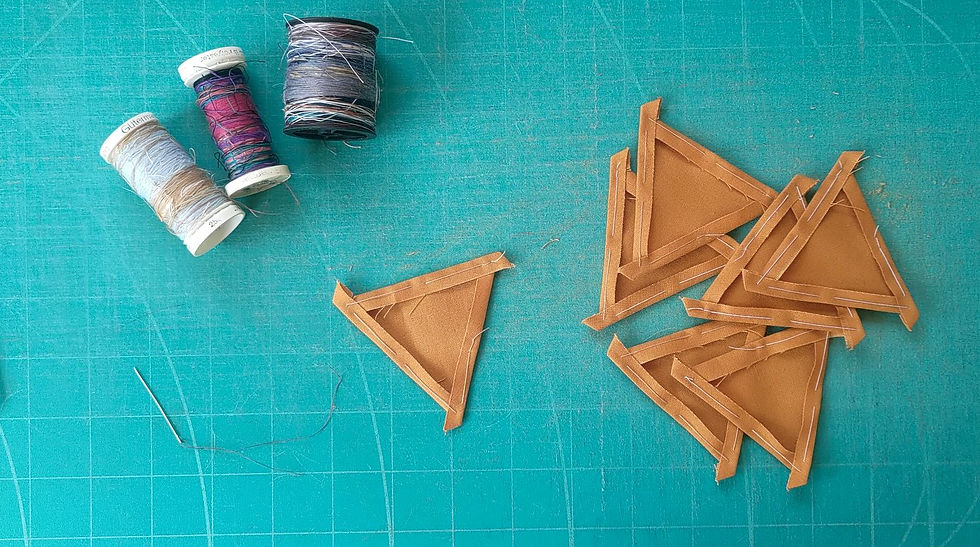
I collect lengths of old thread on empty spools to use for this, and have a serger that I sometimes use when making garments that produces a lot of long wasted threads. I also have old spools of thread inherited from my Omi that are too weak to run through a sewing machine that are good for basting as well.
Pressing
The final step is another optional one; pressing the basted shape.
I usually don't do this for small shapes since the finger pressing and basting are plenty to hold them, but larger shapes really benefit from being pressed.
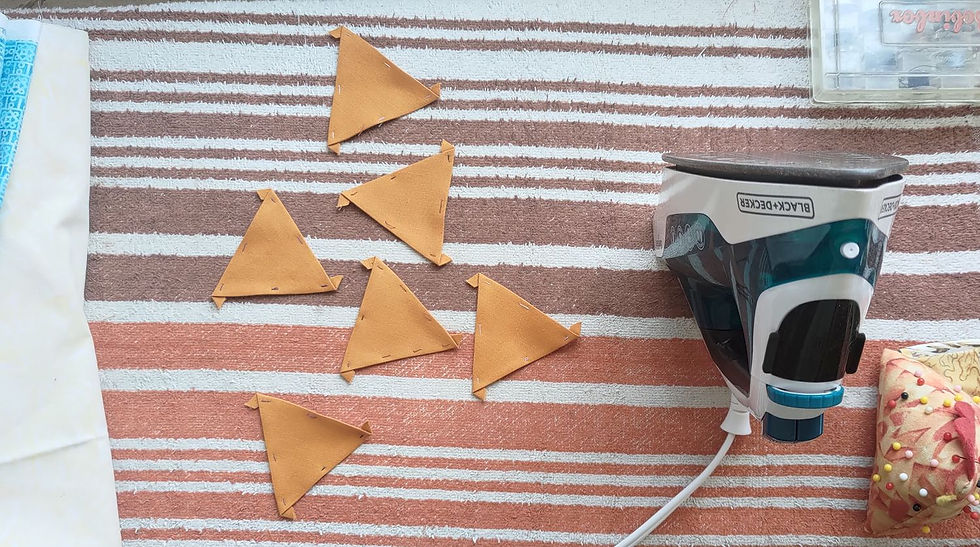
In my opinion, any side that is longer than 3" or 4" should be pressed while pressing isn't necessary for anything smaller.
I spent most of yesterday cutting and basting joining pieces for my Ice Cream Soda quilt, and though I have many more cut than basted for now, this has given me plenty of pieces to get started!
If you've ever tried hand piecing, was this a method you used, or did you find a different one that suited you? I would love to hear how you prepare your pieces for hand stitching in the comments below or privately by email!
I look forward to sharing my Ice Cream Soda progress soon!
Until Next Time Friends, Happy Quilting!
~VA
My Ice Cream Soda quilt is based on a design by Jodi Godfrey of Tales of Cloth.


Comments