
Stitches in Stone: Fabric Requirements

Hello Friends and Welcome Back!
After another week of warm Summer weather, and the occasional thunder storm, I'm excited to share the first set of instructions for the Stitches in Stone quilt along!
We started the quilt along last week by taking a look at the design of the quilt, and I shared the inspiration behind the pattern, as well as my process for designing the quilt!
Moving forward, we'll be focused on taking this design and making it our own!
I can't wait to get started!
August
For the first month of the Stitches in Stone quilt along, we won't be doing any actual stitching, instead, we'll be focused on deciding the size and colours of the quilt we want to make!
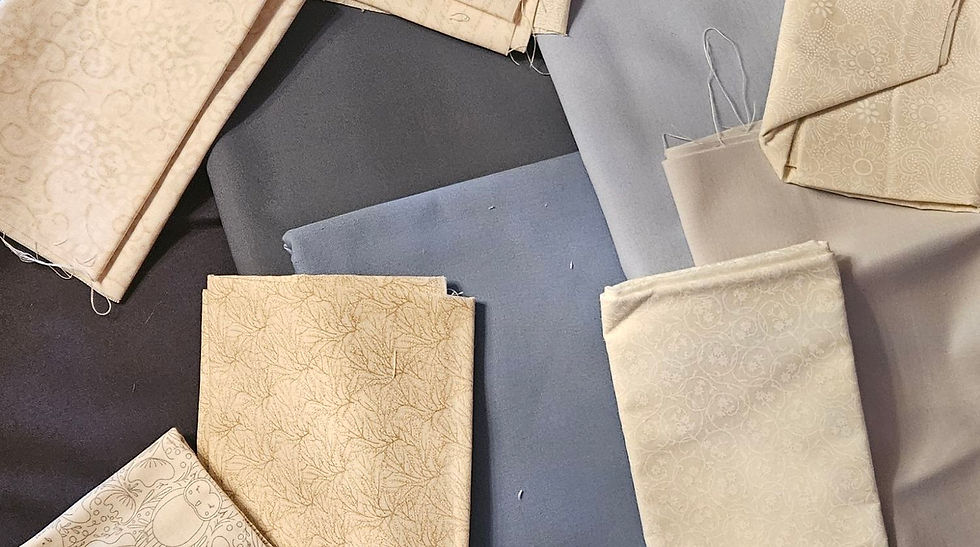
Colour selection is one of my favourite parts of the quilt making process! But since I know not everyone enjoys it as much as I do, I've put together a few additional colour schemes that you can choose from, and some tips for those of you who want to make your own unique selection!
Pattern Notes
Read all instructions before piecing
Fabric requirements are based on a 44” usable width of fabric
All seams are sewn using a ¼” seam allowance unless otherwise specified
Each seam should be pressed before stitching the next, and completed units should be pressed before trimming
Pattern is rated for an advanced beginner or intermediate level quilt maker
Quilt Sizes
The Stitches in Stone pattern is available in two finished sizes:
The small quilt finishes at 60" x 60", appropriate for a throw sized quilt, while the large quilt finishes at 108" x 108", appropriate for a queen or king sized bed.
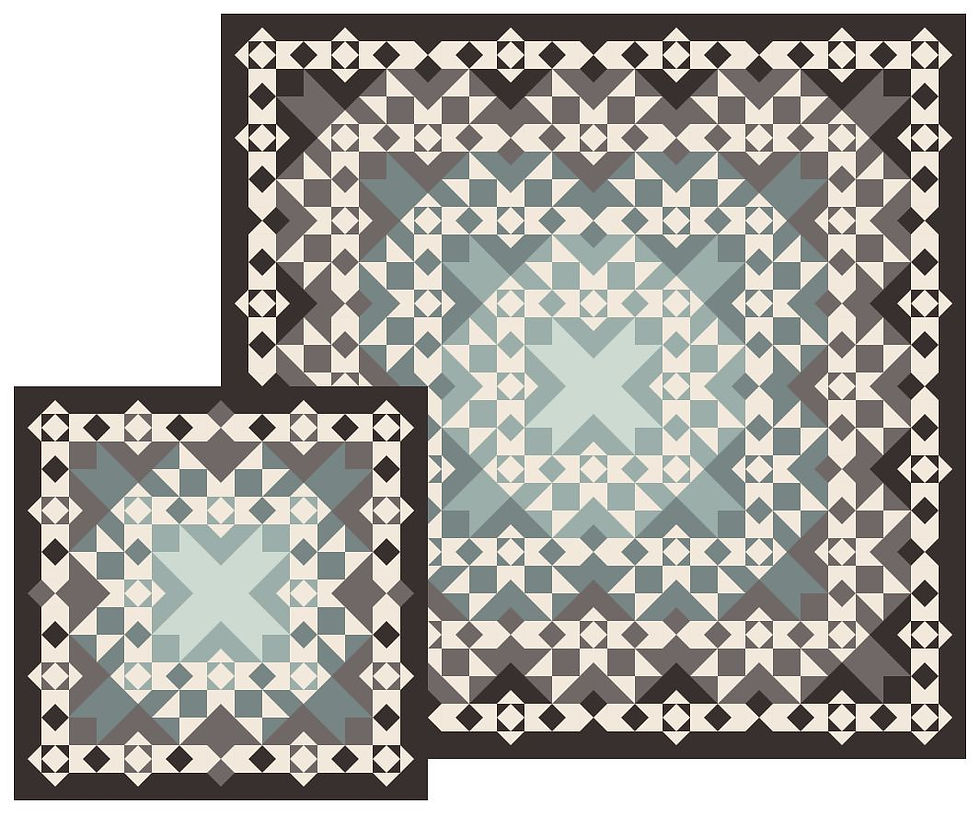
Both quilt sizes make use of the following colours:
Background A - pale blue
Background B - light blue
Background C - medium blue
Background D - medium grey
Background E - dark grey
Accent - white
Fabric Requirements
The following fabric requirements express the minimum required yardage to make this pattern. Additional fabric can be bought to allow for errors in piecing or cutting, or to add borders to adjust the finished size of the quilt.
For a small quilt, you will need:
Background A - 0.3m
Background B - 0.4m
Background C - 0.5m
Background D - 0.6m
Background E - 1.0m
Accent - 1.2m
For a large quilt, you will need:
Background A - 0.3m
Background B - 1.0m
Background C - 1.6m
Background D - 2.3m
Background E - 2.6m
Accent - 4.0m
These fabric requirements can be downloaded as a PDF here:
Stitches in Stone Sample Quilt
The original colours used in my version of the Stitches in Stone pattern were inspired by distant mountain landscape:
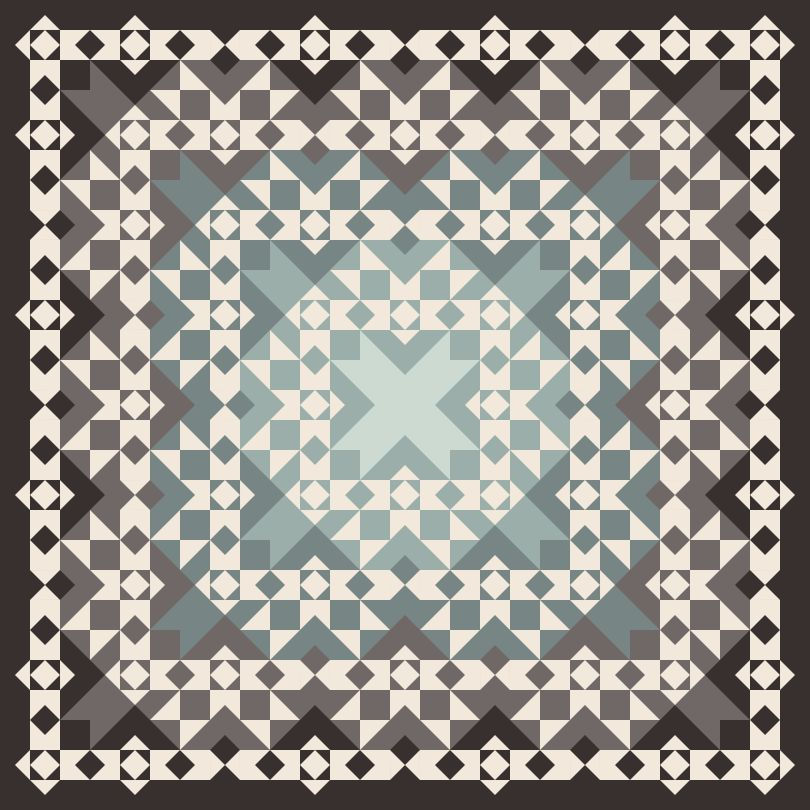
The background features dark, stony greys around the perimeter, like mountain peaks rising around the quilt, which fade into pale, cool blues towards the quilt centre, reminiscent of the faraway sky above!
The accent chains are pieced in white, like crochet lace or snowy mountain peaks!
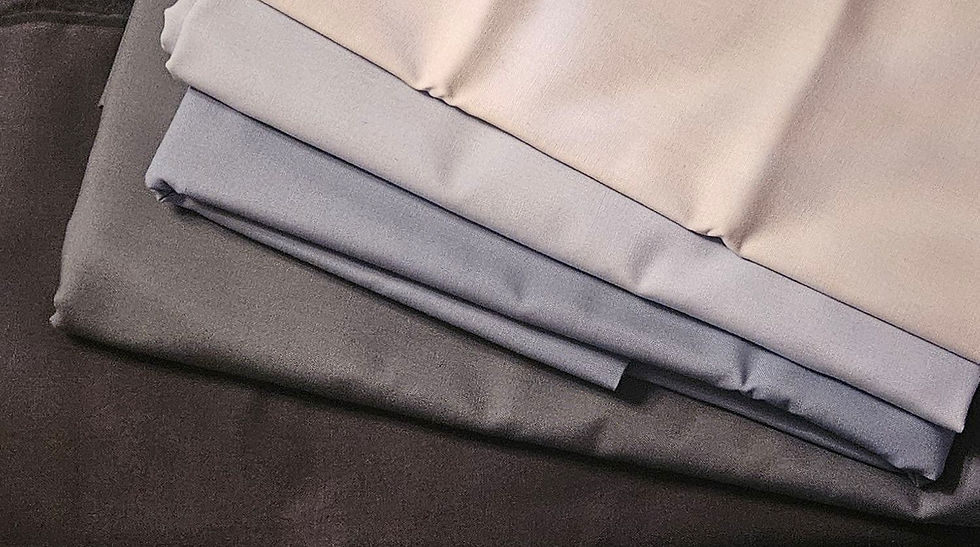
For the background, I chose to use solids. These seem appropriately crisp for a mountain landscape, and without a printed pattern, will help to define the geometric background motif!
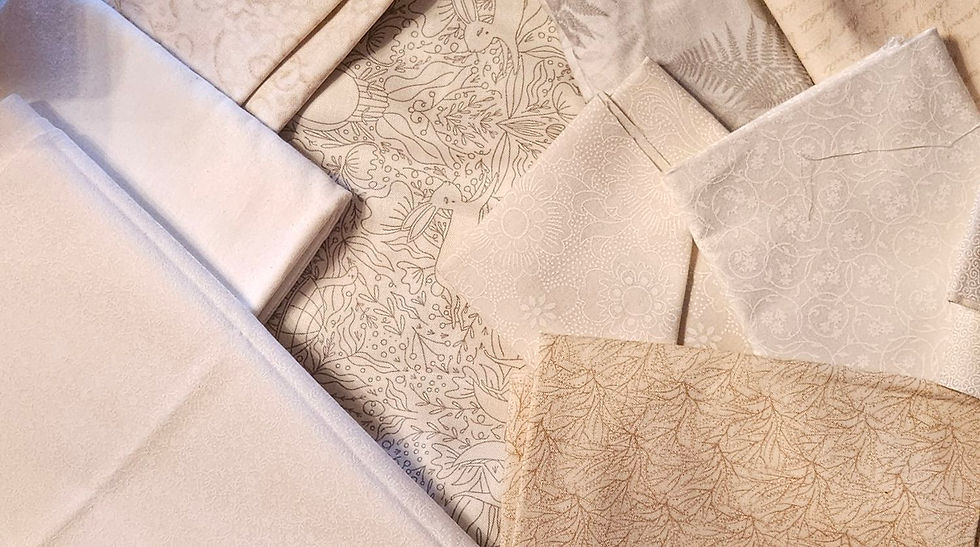
For the accent chains, I'll be using a scrappy assortment of white prints. By mixing different prints, I'm hoping to achieve a sort of lacy imprecision, reminiscent of hand stitched crochet squares!
Colour Selection
I'm really excited about the combination of prints and solids I've planned for my version of the Stitches in Stone pattern and you're welcome to make your own quilt using these colours too!
Of course, there are many different types of mountain ranges that you could draw inspiration from!
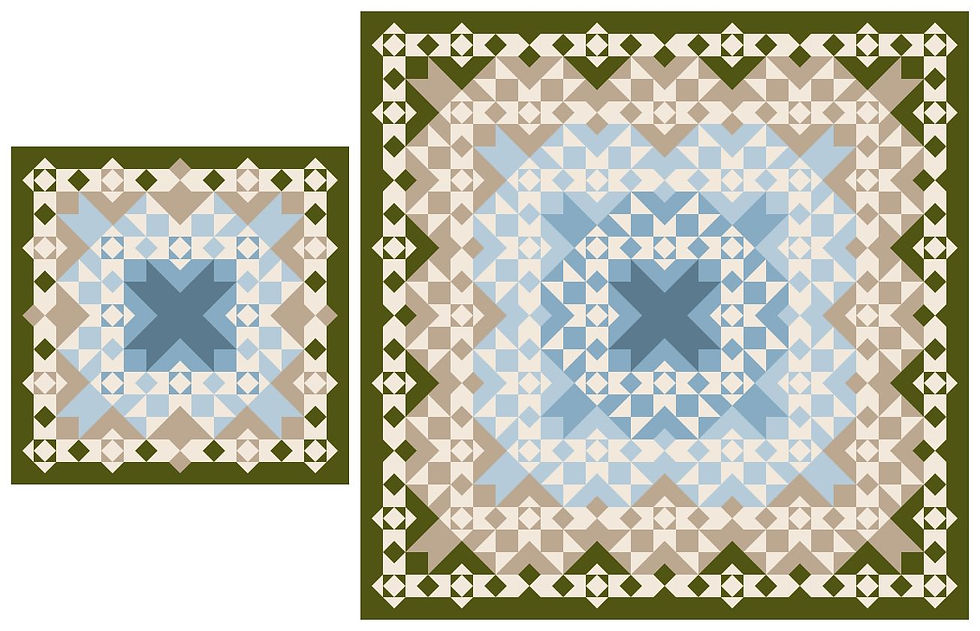
For a warmer mountain range, you could look to the lower mountains, with grassy meadows, rocky peaks rising above, and the blue sky overhead!
For colour placement:
Background A - mossy green
Background B - warm grey
Background C - light blue
Background D - medium blue
Background E - dark blue
Accent - white
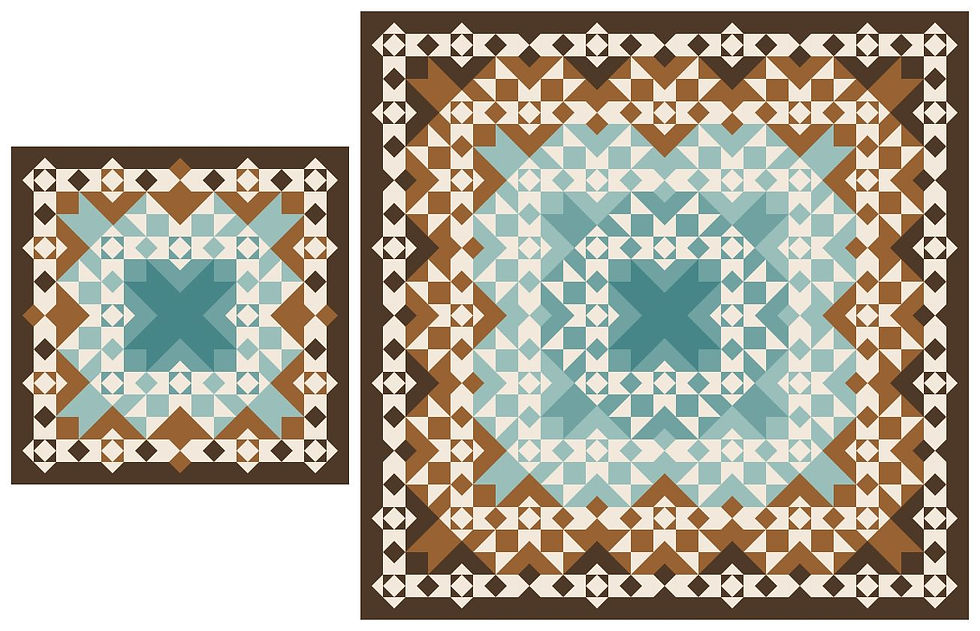
Desert mountain ranges often feature warm, coppery cliffs, with an almost tealy blue sky above!
For colour placement:
Background A - dark brown
Background B - copper brown
Background C - light blue
Background D - medium blue
Background E - dark blue
Accent - white
Or consider a change to the time of day!
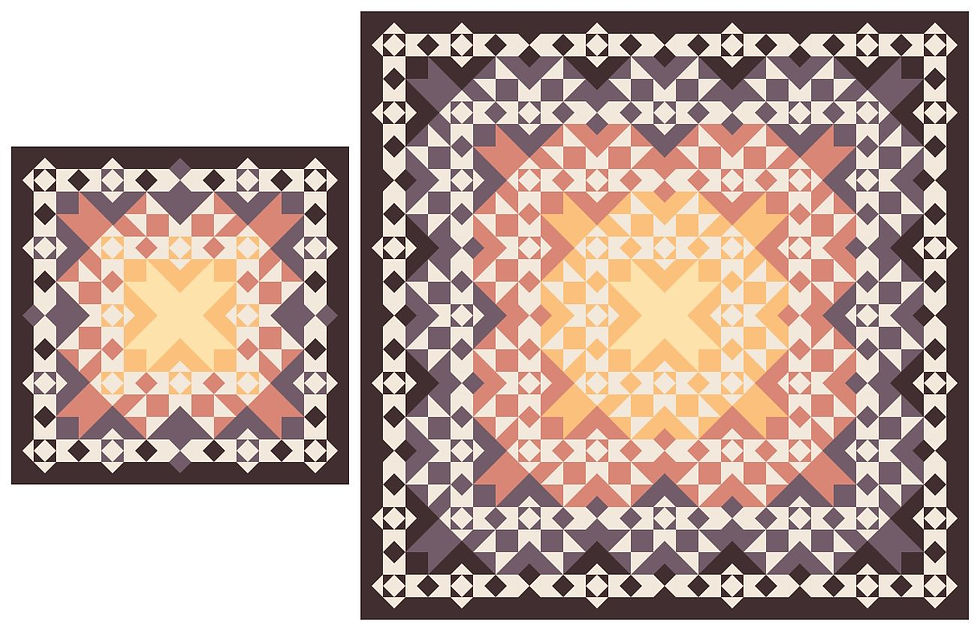
A sunset behind the mountains would produce dark purpled cliffs and warm pinks and golds in the sky behind!
For colour placement:
Background A - dark grey
Background B - lavender
Background C - light blue
Background D - medium blue
Background E - dark blue
Accent - white
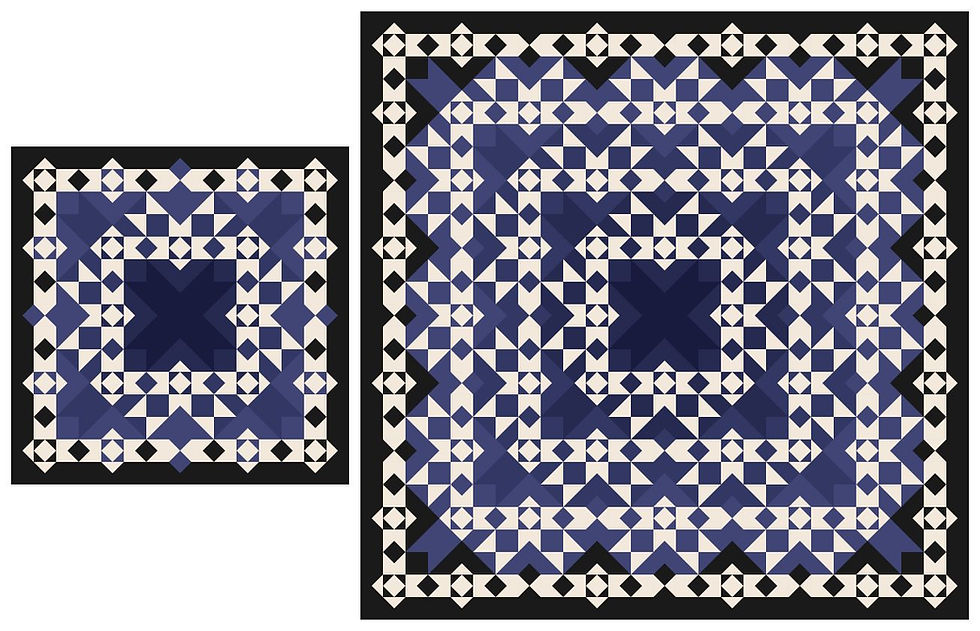
Or a nighttime sky with dark cliffs, midnight blue skies, and the white accent chains looking like stars!
For colour placement:
Background A - black
Background B - midnight blue, light
Background C - midnight blue, medium
Background D - midnight blue, dark
Background E - navy
Accent - white
And there are many other landscapes to draw experience from!
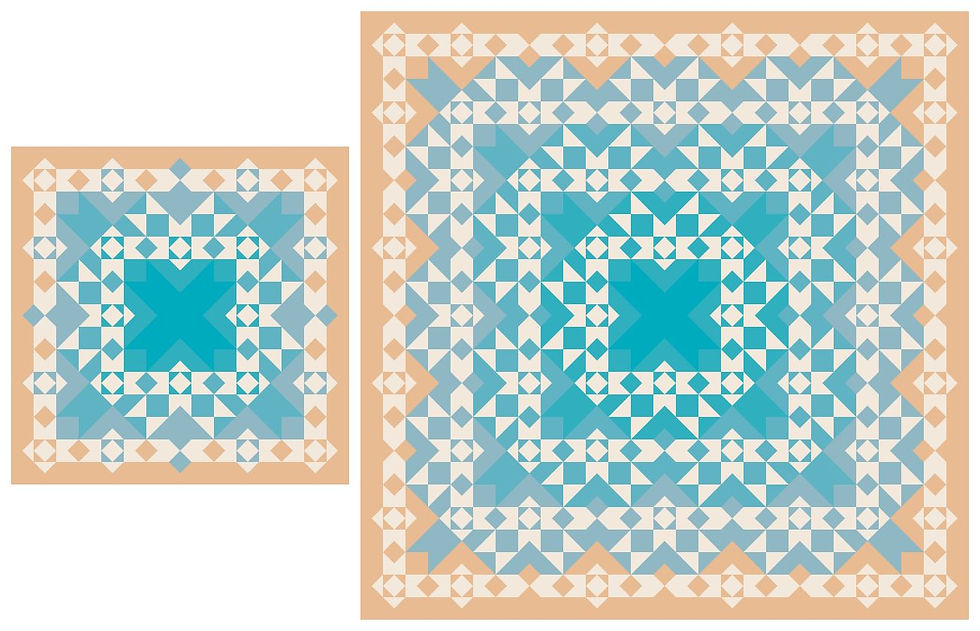
For a beach scene, you might think of warm sands and blue seas, with white foam created by the movement of waves!
For colour placement:
Background A - beige
Background B - pale blue
Background C - light blue
Background D - medium-light blue
Background E - medium blue
Accent - white
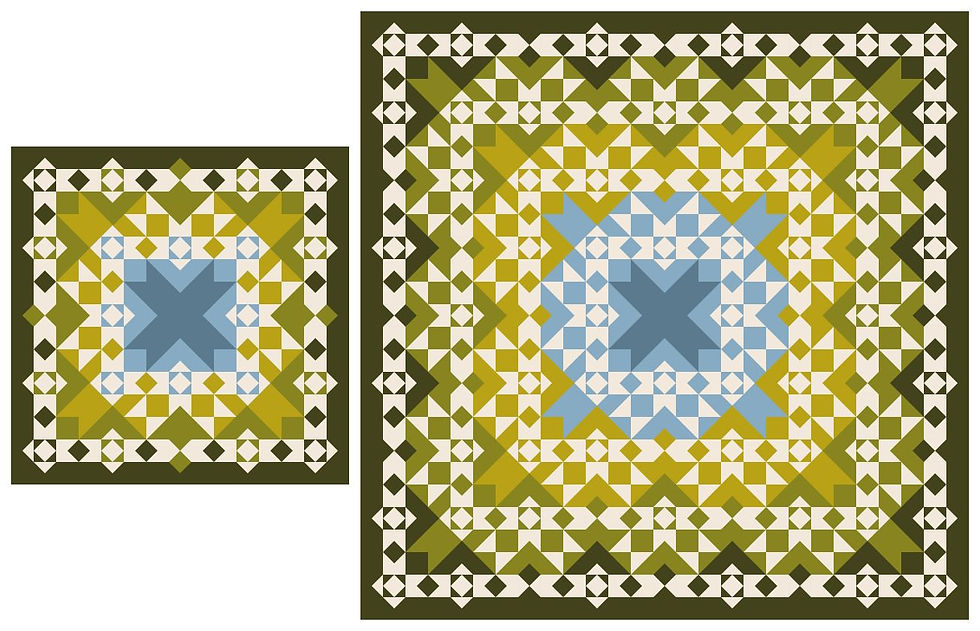
Or for a forest, use a variety of mossy greens for the trees that reach to the blue sky high about!
For colour placement:
Background A - dark green
Background B - mossy green
Background C - yellow-green
Background D - medium blue
Background E - dark blue
Accent - white
And there are infinitely more possible colour schemes! If you'd like to try drawing some for yourself, download the colouring page below!
Friends, I am so excited to be starting a new quilt along with all of you!
I can't wait to see what colours and prints you'll choose for your own version of the Stitches in Stone pattern! Please share photos of your fabric pulls in the comments below, by sending me an email, or by tagging your posts with #stitchesinstonequilt!
We'll start piecing our quilts next month, so join me again on 01 September to continue the quilt along!


Comments