
Summer Garden: March Jack's Delight Block
- vafibrearts

- Mar 7, 2023
- 4 min read
Hello Friends and Welcome Back!
With the first week of March coming to an end, I'm excited to be continuing the Summer Garden BoM!
Last month, we made the Snowball block. Snowball is a very basic quilt block, so it was really exciting to hear about some people's first experience making it! There were even a few who took the initiative to make their Snowball blocks extra special by changing the size of the corner triangles!
But after that basic block, this month we'll be back to something just a little more intricate. For the month of March, we will be making the Jack's Delight block, which features half square triangles and bias sewn seams, both of which we've already learned from earlier blocks!
So Friends, let's get started!
Pattern Notes
As usual, before we get into the block instructions, here is a reminder of a few important pattern notes you'll want to keep in mind while piecing your blocks.
The Summer Garden pattern uses a 1⁄4” seam allowance. Test your seam allowance on scrap fabric before beginning to ensure accurate piecing.
And to keep seam allowances flat and make blocks easier to piece, it's recommended that you press each seam after sewing. Seams can be pressed to one side or open, however you prefer.
Making the Jack's Delight Block
Continue piecing your Summer Garden quilt by following the instructions below!
To make one Jack's Delight block, cut the following:
From background fabric:
2x squares at 6 ¼", cut in half diagonally to make 4x triangles
7x squares at 2 ½"
2x squares at 2"
From fabric A:
7x squares at 2 ½", draw a diagonal line on the back of each
From fabric B:
1x square at 5"
To assemble the Jack's Delight block:
Select one 2 ½" background square and one 2 ½" fabric A square. Place them right sides together and stitch ¼" on either side of the drawn line.
Cut along the drawn line to make two half square triangles.
Trim to 2" square.
Make 14.
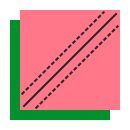
Using the 14 half square triangle units, two 2" background squares, and the 5" square of fabric B, assemble the centre unit of the block as shown below.

Select one 5 ½" background triangle. Sew the long edge of the triangle to one edge of the centre unit, aligning them in the middle. Note that the corners of the background triangle will extend beyond the corners of the centre unit.

Repeat with the remaining three background triangles.

Trim block to 10 ½" square.
For a lap quilt, make 4.
For a twin quilt, make 9.
For a queen quilt, make 14.
Full PDF instructions for the Jack's Delight block can be downloaded here:
Summer Garden Jack's Delight Block
For the original version of the pattern, Jack's Delight was made with a white centre square, pink points, and a green background.

This colour choice was once again inspired by the wild clover that grows in my yard in the summer months, but this time, it's the red clover! Red clover is also not native to Southern Ontario but is a common backyard wildflower. The flower typically grows in large, round clusters of florets in a deep magenta colour.
I used magenta fabric for the points of the Jack's Delight block to imitate the colour of the red clover, but made the centre an uncharacteristic white. I liked the fantastical effect of the white and lilac combination in the Bear Paw block and wanted to make this one a little less realistic as well!

The white makes a really great contrast to the darker and more intense tones used in the rest of the block!
To make your own Jack's Delight block, feel free to use this original colour scheme or alter the colours to reflect the flowers found in your own garden! You could also choose totally unique colours without any relation to the original theme of the pattern, check out the Fabric Requirements post for more inspiration!
Garden of Cards Jack's Delight Block
For the version of the Summer Garden quilt I'm making along with the rest of you, I took inspiration from the Queen of Hearts' rose garden from Alice in Wonderland.
The first variation of the block I made was my two tone, black and white playing card version.

The single central motif gives the impression of an ace card, though I'm not sure if it looks more like a club or a spade.
The second version of the block is much more colourful, reflecting the colours of the garden itself rather than the card soldiers who maintain it.

The central square surrounded by small points creates a floral effect, so I chose to make it in red and white, like the red-painted white roses. I could have chosen to make the points all in one colour and the centre in the other, but I decided to use both colours in the points to create a little variation in these blocks!
I'm really happy with the unique effect of these blocks! I think they'll add some really interesting detail to the quilt top!
If you're interested in a more detailed explanation of how I chose the colours for this version of Summer Garden, check out my Colour Selection post!
Friends, I am so excited to see the quilt slowly coming together! Each of the different block patterns brings something new and interesting to the overall effect of the quilt and the release of each new pattern brings us one step closer to a finished project!
Now that you're all caught up on my progress with the Summer Garden BoM, I would love to see how you're doing! Please share your questions, photos, and stories in the comments below or by tagging me on Instagram @v.a.fibre.arts! You can also use #summergardenbom to share your progress on other platforms!
The next instalment of the Summer Garden pattern will be released on 11 April, that gives us five weeks to finish this month's block! And once April does arrive, please visit me again for the next set of block instructions!


Comments