
Project Update: 08.09.2026

Hello Friends and Welcome Back!
Over the past few weeks, my time has been somewhat monopolized by the renovations. Priming and painting are some of the few steps that I can be trusted to do unsupervised, so those have largely been left for me to complete!
And while it's nice to finally be more useful, the timing hasn't been great because I've had a bunch of end of Summer plans scheduled with Mom, Grandma, and my Sister.
So while I'm feeling like I haven't accomplished much of anything on my stitching projects, I wanted to take a look back at my recent progress and see how I've actually been doing!
Let's take a look!
Crochet Afghan
After completing 72 individual crochet squares, I'm excited to start putting them together!
In my last project update, I shared my plan to add sashing between each of my squares, since then, I've made a few mockups to test the effect of different widths of sashing and joining stitches!
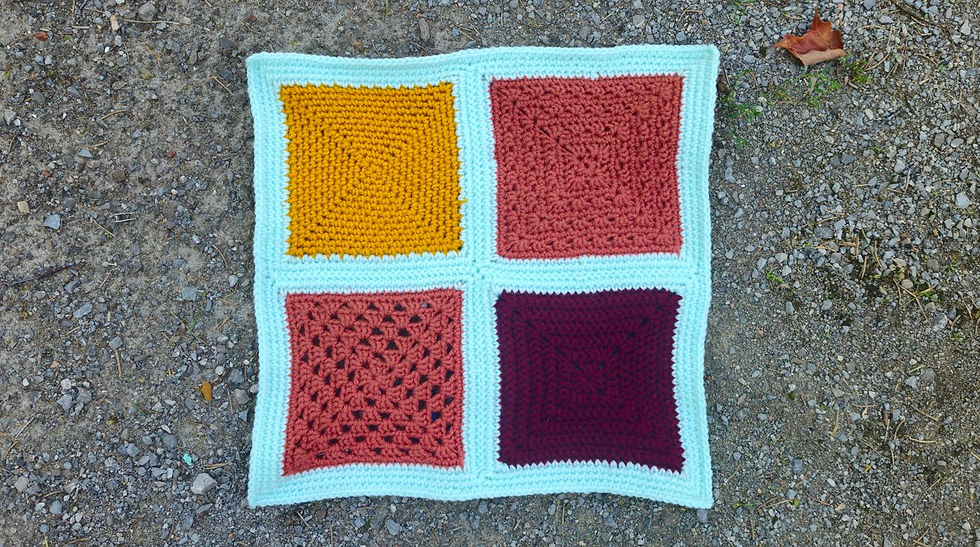
I started by adding two rounds of single crochet around each square, adding up to a sashing width of four rows!
I'm happy with the appearance and texture this creates, but I feel like it came out a bit too wide for the size of the squares.
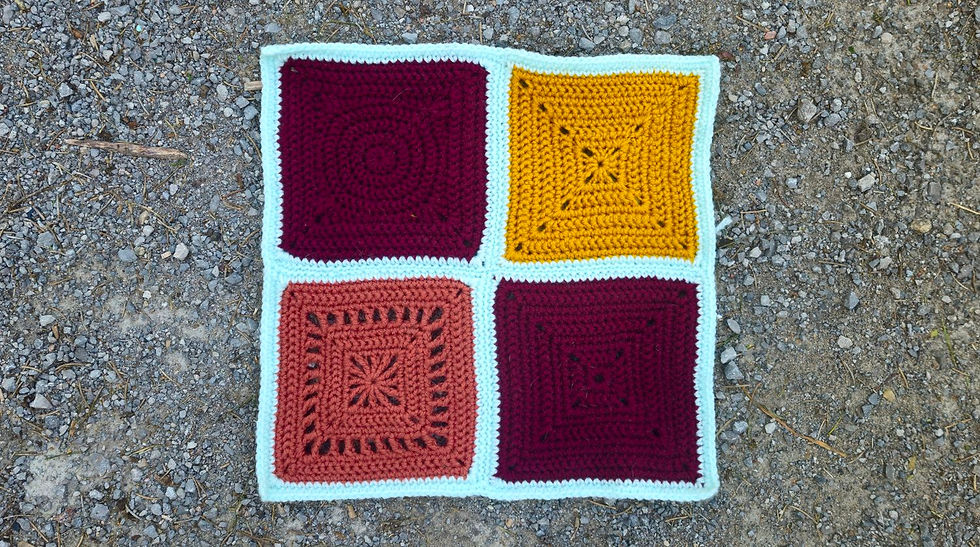
For my next attempt, I stitched one round of single crochet around each square, for a sashing width of two rows!
This time, I felt like the sashing came out too narrow.
From what I've learned about crochet over the last few months, a half double crochet stitch is basically an oversized single crochet, so if I stitch one round of that around each square, it should result in a sashing width that falls somewhere in the middle of my two mock ups.
Instead of testing this theory on a third mock up, I decided to jump into stitching it on my project squares!
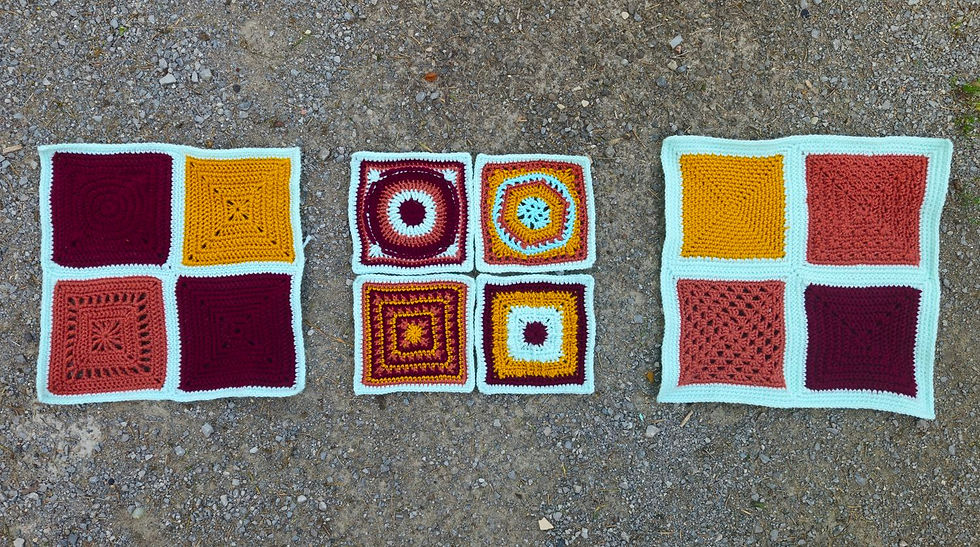
I haven't had time to seam them together yet, but so far, my theory about the half double crochet stitch seems to be accurate!
And speaking of seams, I've learned that there are a lot of different ways to stitch together crochet squares!
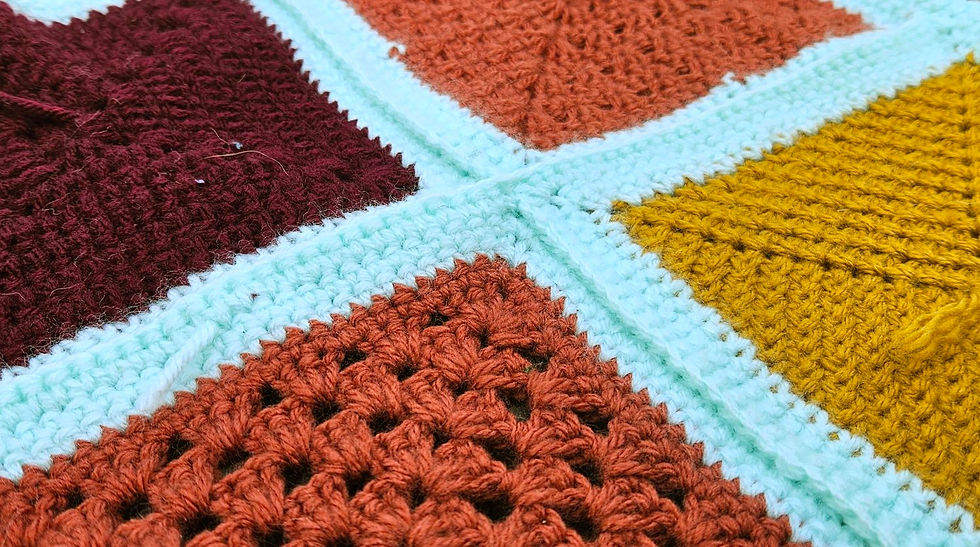
On my first mock up, I stitched my squares together from the back using a single crochet stitch. It creates a thick seamline on the back of the project, which you can see in the picture, but I wanted to try to achieve a smoother finish!
After looking through a number of methods and tutorials online, I found that most crochet based methods create some king of noticeable finish like my first attempt. So I decided to switch to a sewing stitch to try for my next mock up!
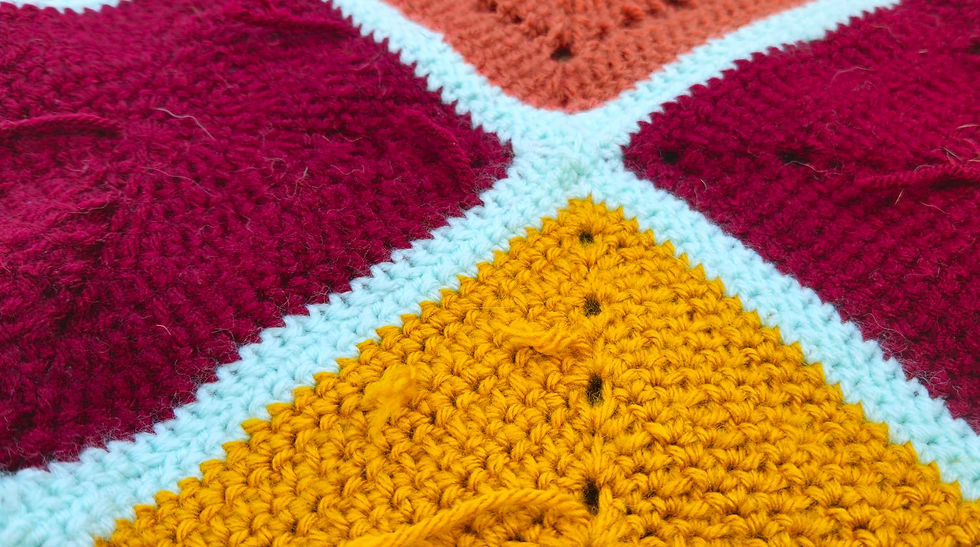
For this one, I used the invisible feather stitch, which is the same stitch I typically use for my EPP projects!
To reinforce the corners of each block, I've incorporated one single crochet to lock in the two ends of my seam. This feels a little more secure than the feather stitch alone!
I'm really happy with the finished effect of the invisible feather stitch, so I think that's the joining method I'll use for my squares!
With all of that decided, I've continued adding sashing rounds to seven of my crochet squares, including two Deco, two Salish, two Happy Haxie, and one Ianthe!
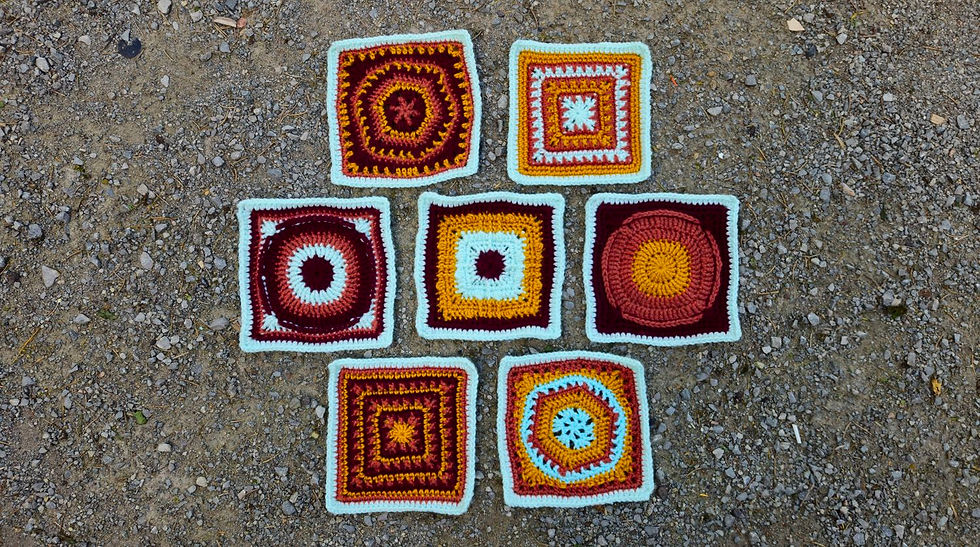
I think I ended up restitching all of seven of these again because I wasn't happy with the tension on my first few attempts, and they'd all ended up finishing at visibly different sizes.
I'm likely to run into this problem many more times as I continue working on this project, but I don't mind! It's all a part of the learning process!
My squares are based on a variety of patterns from Granny Square Flair by Shelley Husband.
Stitches in Stone Sample Quilt
Along with the release of the first pieced step of my Stitches in Stone quilt along last week, I shared a look at my own piecing progress!
September featured Half Square Triangle units, made from accent fabric combined with a selection of background fabrics!
I'm really happy with how my units have turned out and I can't wait to see all of yours start to come together!
Stitches in Stone is my own original design, by Valerie Anne of the Fibre Arts blog, and is currently running as a free quilt along.
Generations Quilt Project
After so much time away from this project, I'm excited to have added some new stitches to one of the Generations Quilts!
This quilt uses many of the blocks I made with darker backgrounds, so there's a lot of contrast between mine and the blocks everyone else made. The checkerboard layout we chose for this quilt really accents that contrast and it's been a lot of fun to put together!

So far, I've joined the four full blocks in one corner of the quilt, as well as the five joining triangles used to square off the shape!
This puts me roughly one third of the way through piecing and I can't wait to continue adding to the quilt!
The Generations Quilt project is based on the traditional Dresden Plate and Six Pointed Star blocks, using templates drafted from extant blocks by Valerie Anne.
Free Motion Quilting Class
In addition to my ongoing projects, I've also started a class to learn a new skill; free motion quilting!
I've tried this on my own in the past, and though I love the organic designs you can get through this type of quilting, I was definitely in need of more practice and some advice from a more experienced free motion quilter!
So when a local store offered a free motion quilting class, Mom and I decided to sign up together!
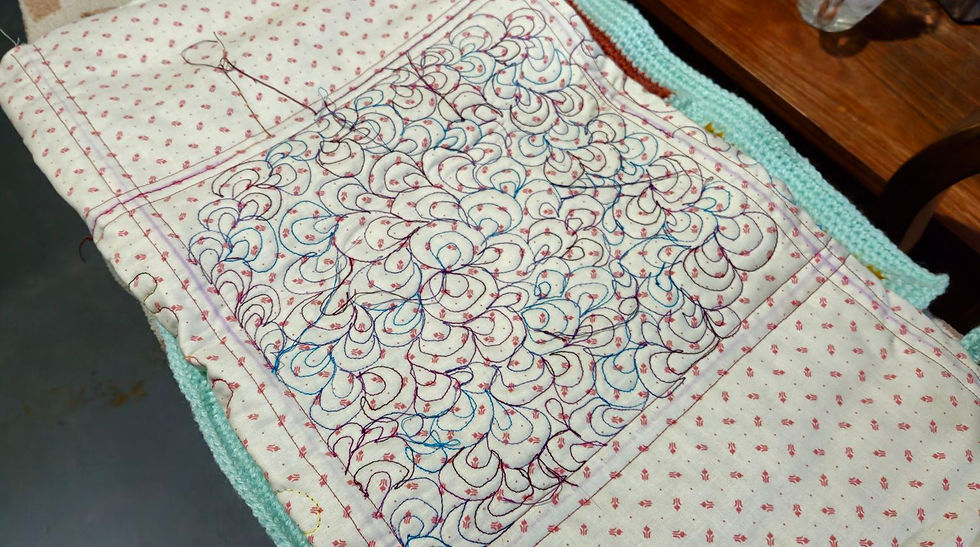
For the first session, we focused on simple designs to learn the proper balance of stitching speed and arm motion.
I've found that, when I want to focus, I tend to slow down my stitching speed, but when free motion quilting, this actually makes the stitching turn out really wonky!
Unlearning unhelpful habits was an interesting challenge, and though we were sent home with the task of practicing, renovations have taken over all of my time and I haven't been able to do any additional practicing!
I hope I can still take away something new from the next session when we're there on Thursday, and maybe I'll be able to dedicate some time to free motion practice once the new sewing studio is ready for me!
The free motion class was taught by Judy Graham at The Quilter's Cupboard.
Friends, it has been so gratifying to look back and see that I've still been able to make progress on my stitching projects despite the time I've needed to dedicate to renovations recently!
Though the renovations are important, engaging with fibre arts is what I find to be the most fulfilling thing I can do as a person, and if I didn't have the time to spend with hook and yarn, or needle and thread, I know I would feel that I had lost a part of myself.
And I hope all of you have found time to dedicate to your own creative endeavors too! Whatever medium you work in, I would love to hear how your projects have been going!
Please share your stories and photos in the comments below, by sending me an email, or by reaching out on Instagram. I can't wait to hear from you!


Comments