
Stitches in Stone: October Quarter Square Triangle Units

Hello Friends and Happy October!
The past week has shown the most colour change of the season so far, with gorgeous reds, oranges, and golds appearing on all the local trees!
I'm lucky enough to have a red maple in the yard at the new house, as well as several sugar maples, and it's been really fun to see the different patterns each type of tree creates!

However, the season has also brought much colder temperatures, as well as crisp breezes and the occasional rain shower, so I've been enjoying the beautiful views from inside my home while working on the next piece of the Stitches in Stone quilt along!
I can't wait to share it with you!
October
This month, we'll be continuing our quilts by making Quarter Square Triangles, using the two at a time method to create two toned units!

Again, there aren't any naked bias edges to worry about, but there is an intersecting seam in the middle of the unit that you'll want to take time to line up well!
Because of this, the Quarter Square Triangle will be the most challenging unit in this pattern, but there aren't nearly as many as last month, so take your time, make practice units from scrap fabric, and you'll get the hang of it!
Pattern Notes
Read all instructions before piecing
Fabric requirements are based on a 44” usable width of fabric
All seams are sewn using a ¼” seam allowance unless otherwise specified
Each seam should be pressed before stitching the next, and completed units should be pressed before trimming
Pattern is rated for an advanced beginner or intermediate level quilt maker
Quarter Square Triangle Cutting Instructions
For a small quilt, cut the following:
Accent: 2 squares at 5½"
Background D: 2 squares at 5½"
For a large quilt, cut the following:
Accent: 12 squares at 5½"
Background C: 2 squares at 5½"
Background D: 4 squares at 5½"
Background E: 6 squares at 5½"
Quarter Square Triangle Piecing Instructions
Select one square each of accent and background fabric.
Mark a 45° diagonal line on the back of one of the squares.
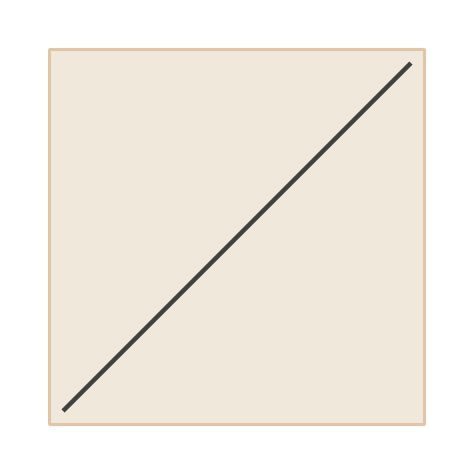
Place the two squares right sides together, with the marked line facing up.
Sew ¼” to either side of the line.
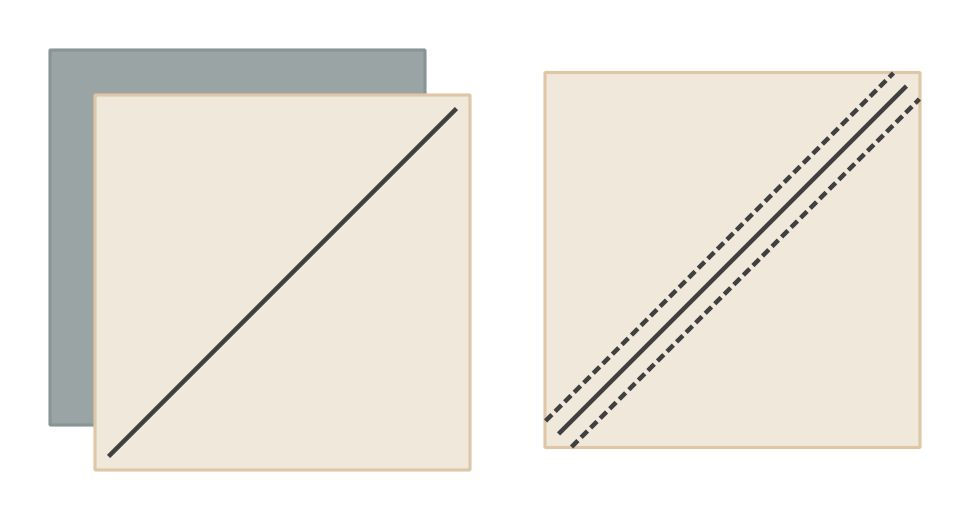
Cut along the line to separate into two half square triangle units.
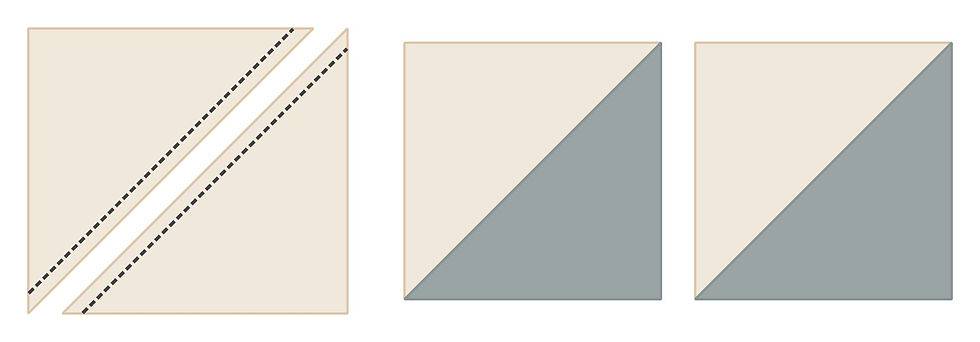
Mark a 45° diagonal line running perpendicular to the seam on the back of one unit.

Tip: You can mark the unit using two different colours if that makes the line easier to see. For example, you could use pencil on the light fabric and white chalk on the dark fabric.
Place the two half square triangle units right sides together, arranged with their seams aligned, their accent fabrics on opposite sides, and the marked line facing up.
Tip: It is much more important to align the seams of the two units than to align their outer edges; if the edges aren't aligned, they can be fixed when the unit is trimmed, but fixing the seam alignment requires you to rip out the seam and try again. I like to thread baste my seams in place to ensure they don't shift while being fed through my machine.
Sew ¼” to either side of the line.

Cut along the line to separate into two quarter square triangle units.

Trim to 4½" square.
For a small quilt, make 4 units:
Make 4 units using Accent and Background D
For a large quilt, make 24 units:
Make 4 units using Accent and Background C
Make 8 units using Accent and Background D
Make 12 units using Accent and Background E
Tip: Remember to sort and label your completed units!
Full PDF instructions for piecing your October Quarter Square Triangle units can be downloaded here:
Stitches in Stone Sample Quilt
With the arrival of October, I realized I hadn't started my units for Stitches in Stone, so I set aside some time over the weekend to work on piecing!

This month leans more towards the grey end of my colour spectrum, including my medium blue, medium grey, and dark grey background fabrics! These are paired with my white accent prints to create a lovely, high contrast unit!
Because there's so much contrast in my units, getting the seams matched accurately at the centre of the unit is pretty important, since high contrast colours will make it really easy to see errors.

I like to use thread basting to keep my seams aligned; though it takes a bit longer than pinning, I've found that it produces a much more accurate end result!
And once I was happy with my completed units, I sorted them by background colour and labelled each pile so I'll know what they're for when I'm finally ready to piece my quilt top!

All together, it took me 32 minutes to press and cut the fabric needed for the large size, and 2 hours and 14 minutes to assemble piece and trim my units, including ripping out and restitching one inaccurate seam!
That's a total of 2 hours and 46 minutes!
With that in mind, I'm estimating that making the small size would take about five minutes for cutting fabric and 25 minutes for unit assembly, for a total of about 30 minutes. If you're making the small size, please let me know if this estimate was accurate!
Friends, thank you for joining me for another month of Stitches in Stone!
I've been having so much fun working on and sharing this project with you all, and I can't wait to see how all of our quilts will turn out!
As you assemble your own Quarter Square Triangle units, please continue to update me on your progress! You can share stories and questions in the comments below, chat with me by email, or send me a message on Instagram!
If you've been sharing your progress elsewhere online, please tag your posts using #stitchesinstonequilt so I can find them!
I hope you'll join me again on 03 November for the next step of our Stitches in Stone quilt along!
Until Next Time Friends, Happy Quilting!
~VA
Stitches in Stone Instructions


Comments