
Midnight Circus: March Double Goose Units
- vafibrearts

- Mar 3
- 6 min read
Hello Friends and Welcome Back!
After another month of ice and snow, I'm beginning to question the groundhog's credentials. But I continue to hope for warmer weather soon!
And with the Winter weather persisting into March, we have a good excuse to stay in and work on this month's quilt along units!
Midnight Circus brought us an easy month of piecing in February, so hopefully you found time to finish those units, and maybe catch up on any of the previous months if needed!
Moving into March, we'll be working on a unit we've already made once before, but this time in new colours! Let's take a look!
March Units
For the month of March, we have another round of Flying Goose units to make!
These will turn out a little different than November's units as they'll be made from fabrics A and D!

But while the fabrics are different, the assembly methods will be the same; patchwork piecing using templates, stitch and flip piecing, or four at a time assembly. You can reuse the method you chose in November if you found it effective, or try out something new!
Once all the March Flying Goose units have been made, we'll be combining them with those made in November to create our Double Goose units!

These are made by stitching two different Flying Goose units together with the points meeting in the middle of the unit. Given that it's only one additional seam and no additional cutting, there is only one set of instructions for Double Goose assembly.
Pattern Notes
pattern assumes 44" usable width of fabric (WoF)
sew all seams using a ¼” seam allowance
press each seam before sewing the next and before trimming units
read all pattern instructions and notes before beginning to piece
optional printable templates can be downloaded here:
Patchwork Pieced Flying Goose Units
This method makes one unit at a time using smaller pieces, accommodating the use of fabric scraps and remnants.
Pieces are cut using printable templates.
Cutting Instructions
Cut the pieces that correspond to your chosen quilt size.
Single Flying Goose Unit:
Fabric A - 1 medium triangle
Fabric D - 2 small triangles
Small Quilt:
Fabric A - 12 medium triangles
Fabric D - 24 small triangles
Medium Quilt:
Fabric A - 44 medium triangles
Fabric D - 88 small triangles
Large Quilt:
Fabric A - 92 medium triangles
Fabric D - 184 small triangles
Piecing Instructions
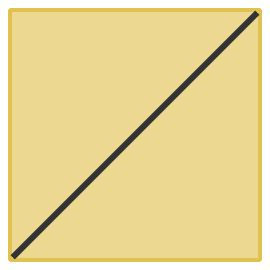
Select one medium triangle of fabric A and one small triangle of fabric D.
Place them right sides together with the long side of the small triangle aligned with one of the short sides of the medium triangle. Sew along that side.

Place the remaining small triangle of fabric D with its long side along
the other short side of the medium triangle, right sides together. Sew along that side.

Trim the finished Flying Goose unit to 4½” x 2½”.
For a small quilt, make 12.
For a medium quilt, make 44.
For a large quilt, make 92.
Proceed to Double Goose unit assembly.
Stitch and Flip Flying Goose Unit
This method makes one unit at a time using smaller pieces, accommodating the use of fabric scraps and remnants, but does produce some fabric waste.
Pieces are cut using quilting rulers.
Cutting Instructions
Cut the pieces that correspond to your chosen quilt size.
Single Flying Goose Unit:
Fabric A - 1 rectangle at 4½” x 2½”
Fabric D - 2 squares at 2½”
Small Quilt:
Fabric A - 12 rectangles at 4½” x 2½”
Fabric D - 24 squares at 2½”
Medium Quilt:
Fabric A - 44 rectangles at 4½” x 2½”
Fabric D - 88 squares at 2½”
Large Quilt:
Fabric A - 92 rectangles at 4½” x 2½”
Fabric D - 184 squares at 2½”
Piecing Instructions
Select two squares of fabric D. Draw a 45° diagonal line on the back of both squares, running from corner to corner.
Place one fabric D square on one end of the fabric A rectangle, right sides together with the drawn line facing up. Sew along the drawn line.

Trim the excess fabric from the corner, leaving 1⁄4” for seam allowance.

Place the remaining square of fabric D on the fabric A end of the pieced unit, right sides together, with the drawn line facing up and crossing the seam of the pieced unit. Sew along the drawn line.

Trim the excess fabric from the corner, leaving 1⁄4” for seam allowance.

Trim the finished Flying Goose unit to 4½” x 2½”.
For a small quilt, make 12.
For a medium quilt, make 44.
For a large quilt, make 92.
Proceed to Double Goose unit assembly.
Four at a Time Flying Goose Unit
This method makes multiple units at a time using large squares of fabric, requires yardage or large fabric remnants.
Pieces are cut using quilting rulers.
Cutting Instructions
Cut the pieces that correspond to your chosen quilt size.
Single Flying Goose Unit:
Fabric A - 1 square at 5½”
Fabric D - 4 squares at 3¼”
Small Quilt:
Fabric A - 3 squares at 5½”
Fabric D - 12 squares at 3¼”
Medium Quilt:
Fabric A - 11 squares at 5½”
Fabric D - 44 squares at 3¼”
Large Quilt:
Fabric A - 23 squares at 5½”
Fabric D - 92 squares at 3¼”
Piecing Instructions
Select four squares of fabric D. Draw a 45° diagonal line on the back of each square, running from corner to corner.
Place two squares of fabric D in opposite corners of the large square of fabric A, right sides together with the drawn lines facing up and aligned to form one long diagonal line.
Sew ¼” to either side of the drawn line, then cut along the line to separate the pieced units.

Place one of the remaining squares of fabric D on the fabric A corner of the pieced unit, right sides together, with the drawn line facing up and crossing the seam of the pieced unit.
Sew ¼” to either side of the line.

Cut along the drawn line to separate into two units.
Repeat with the remaining pieced unit and fabric D square.
Trim the finished Flying Goose units to 4½” x 2½”.
For a small quilt, make 12.
For a medium quilt, make 44.
For a large quilt, make 92.
Proceed to Double Goose unit assembly.
Double Goose Unit
Units are pieced one at a time using two Flying Goose units, one pieced in November and one from March.
No additional cutting is required.
Single Double Goose Unit:
Units - 1 November Flying Goose
1 March Flying Goose
Small Quilt:
Units - 12 November Flying Goose
12 March Flying Goose
Medium Quilt:
Units - 44 November Flying Goose
44 March Flying Goose
Large Quilt:
Units - 92 November Flying Goose
92 March Flying Goose
Piecing Instructions
Select one November Flying Goose unit and one March Flying Goose unit.
Place them right sides together with the seams aligned and sew along the long side with the small triangles.

Trim the finished Double Goose unit to 4½”
For a small quilt, make 12.
For a medium quilt, make 44.
For a large quilt, make 92.
Instructions for both Flying Goose unit assembly and Double Goose unit assembly can be downloaded here:
Midnight Circus Sample Quilt
February was a really productive month for my Midnight Circus quilt! I've added a lot more quilting, and also expanded the quilt itself!

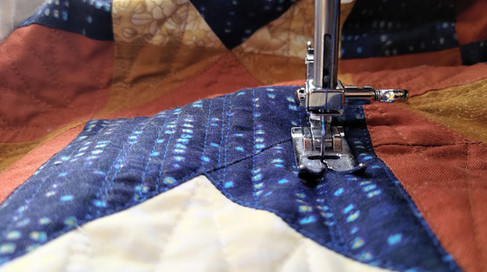


I'm really enjoying the mix of hand and machine quilting in the background areas! The texture feels really nice and creates some fun visual interest!
As for quilt expansion, there has been a lot of change to the amount of quilt that's been joined together!


I was really excited to have added my third corner to the quilt a few weeks ago, and even pieced on the adjoining border strips! And just yesterday, I added another row featuring the last of my star blocks to the opposite corner!
Now, the quilt top is very nearly in one piece! I can't wait to see how much it changes in the next month!
Friends, thank you so much for joining me for another instalment of the Midnight Circus quilt along!
I'm excited to see your next round of Flying Goose units come together, and to see how your colour choices will change the Double Goose unit! Please share photos and stories of your progress with me in the comments below, by email, or by tagging your social posts with #midnightcircusquilt so I can find them!
The next step of the Midnight Circus pattern will release on 07 April, I can't wait to see you then!
Until Next Time Friends, Happy Quilting!
~VA
Midnight Circus Instructions


Comments