
Midnight Circus: May Quilt Top Assembly
- vafibrearts

- May 5
- 7 min read
Hello Friends and Happy May!
I've had a slow start to the month with lots of rest while fighting off some kind of sickness. Though I'm feeling quite a bit better than a few days ago, I'm definitely not quite well yet.
Unfortunately, I think I'm going to be missing another quilt guild meeting because of it, but given how much I've enjoyed being sick, I know I don't want to put anyone else through it.
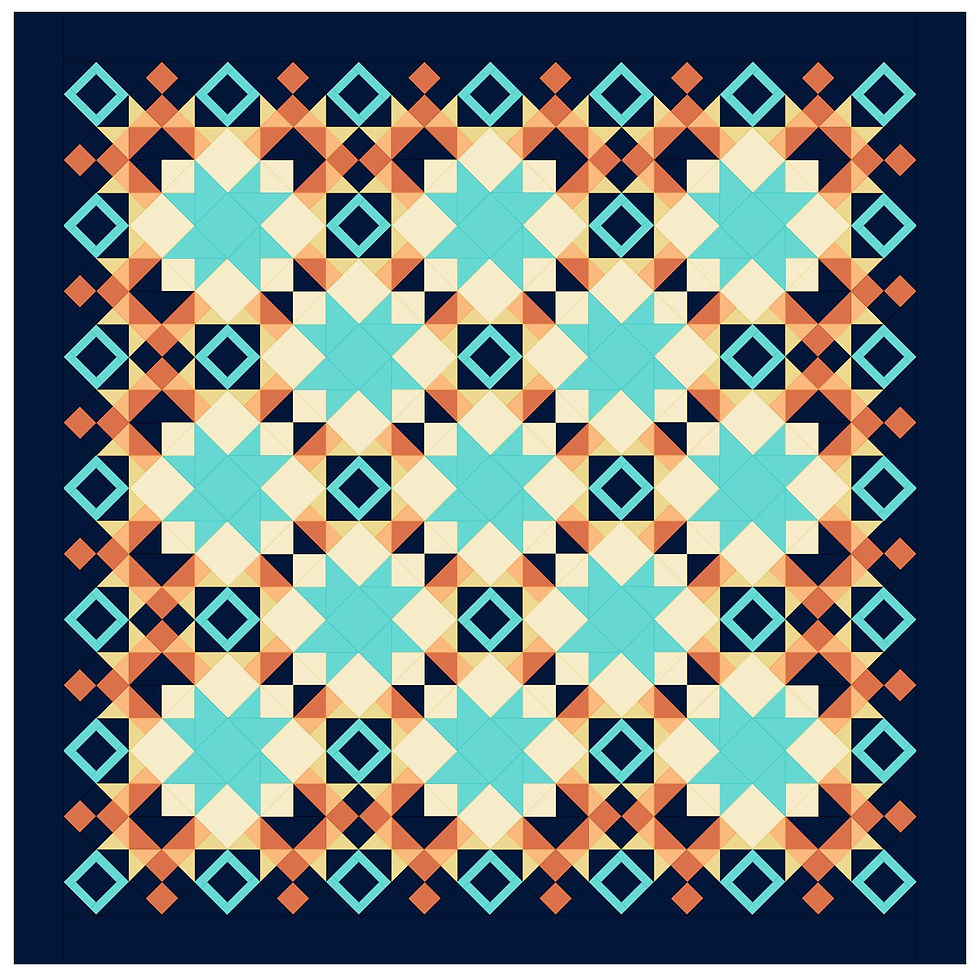
That being said, I hope all of you have had a much better start to May than I have! And I hope you've all found time to finish your April units because this month, we've finally reached the end of the Midnight Circus quilt along!
Let's take a look at how all of the units made so far will come together to complete our quilts!
May Quilt Top
For the month of May, we'll be focused on taking all of the units made so far and assembling them into a finished quilt top!
The instructions are broken down into several parts; inner and outer sashing strips, corner and edge blocks, then piecing rows, assembling the quilt top, and adding borders!

This month, it's very important to pay attention to the orientation of your units to make sure the secondary motifs in the quilt top come together properly! There are lots of diagrams in the pattern instructions to help with this!
And since this pattern is pieced en pointe, there will be a few bias cut pieces around the edges of the quilt, so be gentle with them to avoid stretching the fabric!
If all of this seems like a lot to handle in just one month, don't worry! Take the steps one at a time, and remember that the instructions will remain available on the blog for you to come back to any time!
Pattern Notes
pattern assumes 44" usable width of fabric (WoF)
sew all seams using a ¼” seam allowance
press each seam before sewing the next and before trimming units
read all pattern instructions and notes before beginning to piece
optional printable templates can be downloaded here:
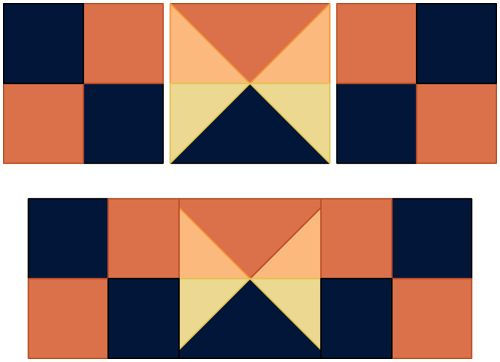
Outer Sashing Strips
Blocks are made using a combination of Double Goose units from March, and Three Quarter Square units from April.
No additional cutting is required.
Single Sashing Strip:
Units - 1 April Three Quarter Square
2 March Double Geese
Small Quilt:
Units - 4 April Three Quarter Squares
8 March Double Geese
Medium Quilt:
Units - 12 April Three Quarter Squares
24 March Double Geese
Large Quilt:
Units - 20 April Three Quarter Squares
40 March Double Geese
Piecing Instructions
Select one Three Quarter Square and two Double Goose units.
Sew the Double Goose units to the two opposite sides of the Three Quarter Square, with the fabric B side of the Double Geese aligned with the fabric A sides of the Three Quarter Square.

Trim the finished Outer Sashing Strip to 12 1⁄2” x 4 1⁄2”.
For a small quilt, make 4.
For a medium quilt, make 12.
For a large quilt, make 20.
Inner Sashing Strips
Blocks are made using a combination of Double Goose units from March, and Quarter Square Triangle units from December.
No additional cutting is required.
Single Sashing Strip:
Units - 1 December Quarter Square Triangle
2 March Double Geese
Small Quilt:
No inner sashing strips required
Medium Quilt:
Units - 4 December Quarter Square Triangles
8 March Double Geese
Large Quilt:
Units - 16 December Quarter Square Triangles
32 March Double Geese
Piecing Instructions
Select one Quarter Square Triangle and two Double Goose units.
Sew the Double Goose units to the two opposite sides of the Quarter Square Triangle, with the fabric B side of the Double Geese aligned with the fabric A sides of the Quarter Square Triangle.

Trim the finished Inner Sashing Strip to 12 1⁄2” x 4 1⁄2”.
For a medium quilt, make 4.
For a large quilt, make 16.
Corner Blocks
Blocks are made using a combination of cut pieces and previously pieced units.
Pieces can be cut using quilting rulers or printable templates.
Cutting Instructions
Regardless of size, all quilts require four corner blocks.
Small, Medium, and Large Quilt:
Fabric A - 4 squares at 5", cut in half diagonally once to yield eight triangles
OR 8 large triangles
1 square at 5 1⁄2”, cut in half diagonally twice to yield four triangles
OR 4 medium triangles
Units - 8 October Four Patches
4 March Double Geese
4 February Square and Sashing units
Piecing Instructions
Select one Double Goose and two Four Patch units.
Sew the Four Patches to two opposite sides of the Double Goose unit, with the fabric B squares aligned with the fabric C triangles to create the upper row.
Select one Square and Sashing unit and two large triangles of fabric A.
Sew the triangles to opposite sides of the Square and Sashing unit, with their angled sides pointed down.

Select one medium triangle of fabric A. Sew it to the bottom edge of the Square and Sashing unit to create the lower triangle.

Sew the upper row to the lower triangle with the long side of the triangle aligned with the fabric A side of the upper row.

Trim the Corner block to 12 1⁄2” x 10 1⁄2”, ignoring the angled corners.
Make 4.
Edge Blocks
Blocks are made using a combination of cut pieces and previously pieced units.
Pieces can be cut using quilting rulers or printable templates.
Cutting Instructions
Cut the pieces that correspond to your chosen quilt size.
Single Edge Block:
Fabric A - 1 square at 5", cut in half diagonally once to yield two triangles
OR 2 large triangles
Units - 3 October Four Patches
2 March Double Geese
1 February Square and Sashing units
Small Quilt:
No edge blocks required
Medium Quilt:
Fabric A - 4 squares at 5", cut in half diagonally once to yield eight triangles
OR 8 large triangles
Units - 12 October Four Patches
8 March Double Geese
4 February Square and Sashing units
Large Quilt:
Fabric A - 8 square at 5", cut in half diagonally once to yield 16 triangles
OR 16 large triangles
Units - 24 October Four Patches
16 March Double Geese
8 February Square and Sashing units
Piecing Instructions
Select one Double Goose and two Four Patch units.
Sew the Four Patches to two opposite sides of the Double Goose unit, with the fabric B squares aligned with the fabric C triangles to create the upper row.
Select one Square and Sashing unit, one Double Goose, and one large triangle of fabric A.
Sew the fabric A square and triangle to opposite sides of the Square and Sashing unit, with the angled side of the triangle pointed down to create the centre row.

Select one Four Patch unit and one large triangle of fabric A.
Sew the triangle to one side of the Four Patch with the angled side pointed down to create the lower row.

Sew the upper and lower rows to opposite sides of the centre row, with the seams aligned and the fabric A triangles creating one continuous angled edge.

Trim the Edge block to 12 1⁄2” square, ignoring the angled corner.
For a medium quilt, make 4.
For a large quilt, make 8.
Proceed to small, medium, or large quilt assembly.
Small Quilt Assembly
Assemble all remaining units, blocks, and sashing, with additional cut pieces, into the finished quilt top.
Pieces can be cut using quilting rulers or printable templates, borders are cut with rulers across width of fabric (WoF).
Cutting Instructions
Fabric A - 4 squares at 5", cut in half diagonally once to yield eight triangles
OR 8 large triangles
4 strips at 4 1⁄2” x WoF
Piecing Instructions
Assemble remaining units into rows, then sew rows together to complete the quilt centre.

Using the fabric A strips, sew borders around all sides of the quilt centre to complete the quilt top.

Small quilt finishes approximately 36" x 36".
Consult the PDF download for more detailed quilt top assembly instructions.
Medium Quilt Assembly
Assemble all remaining units, blocks, and sashing, with additional cut pieces, into the finished quilt top.
Pieces can be cut using quilting rulers or printable templates, borders are cut with rulers across width of fabric (WoF).
Cutting Instructions
Fabric A - 8 squares at 5", cut in half diagonally once to yield eight triangles
OR 16 large triangles
6 strips at 4 1⁄2” x WoF
Piecing Instructions
Assemble remaining units into rows, then sew rows together to complete the quilt centre.

Using the fabric A strips, sew borders around all sides of the quilt centre to complete the quilt top.

Medium quilt finishes approximately 60" x 60".
Consult the PDF download for more detailed quilt top assembly instructions.
Large Quilt Assembly
Assemble all remaining units, blocks, and sashing, with additional cut pieces, into the finished quilt top.
Pieces can be cut using quilting rulers or printable templates, borders are cut with rulers across width of fabric (WoF).
Cutting Instructions
Fabric A - 12 squares at 5", cut in half diagonally once to yield eight triangles
OR 24 large triangles
8 strips at 4 1⁄2” x WoF
Piecing Instructions
Assemble remaining units into rows, then sew rows together to complete the quilt centre.

Using the fabric A strips, sew borders around all sides of the quilt centre to complete the quilt top.
Large quilt finishes approximately 82" x 82".
Consult the PDF download for more detailed quilt top assembly instructions.
Full pattern instructions, including full details regarding quilt top construction and additional diagrams, can be downloaded here:
Thank you so much to everyone who participated in the Midnight Circus quilt along with me this year!
It's been so fun to see all the different colours and fabrics being used, watching everyone's blocks come together, and now I can't wait to see your quilt tops bring everything together!
As you continue piecing and begin quilting your Midnight Circus quilts, please keep sharing updates with me here in the comments, by sending an email, or by using #midnightcircusquilt to tag your posts across social media!
I can't wait to see how all of your quilts turn out, and I hope to be able to share an update on my own Midnight Circus quilt soon too!
Until Next Time Friends, Happy Quilting!
~VA
Midnight Circus Instructions


Comments